Sauna Overview | ||||||
If you're in a hurry, just scroll down through the pictures on this page. Created for efficient electronics thermal analysisFrom the beginning, the Sauna program was created exclusively for the thermal simulation of electronic components and systems. The program contains extensive libraries of the components and materials actually used in the electronics industry. The target user for Sauna is a busy design engineer, either an electrical engineer or a mechanical engineer. These engineers don't have the time to spend a week or two learning a complex CFD (computational fluid dynamics) package. With Sauna, training times are defined in hours, not days or weeks. Thermal network method: easy to understand and use
At the most basic level, Sauna is based on a network of nodes and thermal resistors (also known as the finite difference method). All mechanical and electrical engineers understand this method. But, of course, assigning values to all those resistors and capacitors can be a nightmare. While some engineers persist and perform spreadsheet thermal analysis, the Sauna program provides a much more accurate and efficient alternative. With Sauna you rarely work with individual nodes and resistors. Instead, you work with the high level building blocks of plates and boards. For example, to define the backplate of a heat sink, you simply specify the dimensions and pick a material and surface type. Sauna then creates a "plate assembly" which includes an array of nodes and resistors. If you need to switch material or enlarge the plate, you modify the plate assembly properties and Sauna automatically updates the resistor and capacitor values. It is an easy and intuitive process. Heat sink modeling
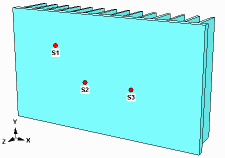
Heat sinks (heatsinks) are probably the easiest thing to model with Sauna. After defining the baseplate, you can add fins with a single command. To define the heat load, you pick a standard package from Sauna's library, or you can define a custom sized device. Normally, the user provides the Rjunction-to-case (Rjc) found on the device datasheet. However, if you're just doing a quick model, you can work with a typical Rjc provided automatically by Sauna. As the last step, you will add "float resistors" to provide a convection and radiation path to the room. To obtain temperatures, you only need to specify the room temperature and a cooling mode. Sauna handles all the details of calculating temperature-sensitive heat transfer coefficients. And Sauna automatically includes a sophisticated gray radiation analysis which includes the effects of shielding between fins. In just a few moments you will have results. If temperatures are not at desired levels, you have many options for optimizing the design. You can easily modify fin spacing or fin thickness or fin length. You can also easily reposition the heat sources, thicken the baseplate or change materials. Sauna is the premier what-if tool for heat sinks. Besides simple heat sinks, you can use Sauna's 3D modeling capabilities to analyze complex heat sink shapes. You can also create detailed stackups of the components. Transient and duty cycle analysis can also be performed. Circuit board (PCB) modeling
As you will see, Sauna has unique features for PCB thermal simulation. As the first step in a PCB thermal analysis, you will define a "board assembly" for one of the laminate layers in the board stackup. As with heat sink modeling, you simply choose a material (usually FR4) and define dimensions. Sauna handles the details of creating individual nodes and resistors. The second step is to create component pads. Sauna includes a library of standard pad configurations for a variety of components, including DPAK's, SOT-223, TOLL, duals (SOIC, PSOP), quads (MQFP, LQFP, QFN), LED packages and more. For the dual and quad components, you can choose between a heat slug and non-heat slug version. When pads are created, you can optionally add an oversized heatsinking pad and/or create a trace flareout. Very quickly, you will have a basic pad layout on the board. With the copper pads on the board, you are ready to add components. For PCB modeling, you would normally use "enhanced heat sources". The enhanced heat source provides for a thermal connection between the junction and each lead pad on the board. And, when necessary, each of these thermal connections can have a unique resistance value. Besides the lead connections, the enhanced source also provides for heat transfer from the top of the component body and another thermal path down into the board. With an enhanced source, the simulation will incorporate heat flow from all surfaces of the package. After adding enhanced sources, you will create interconnecting traces and pads between components. In general, you do not need to exactly replicate the physical layout because traces and pads have limited cooling impact when the trace length is greater than 15-20 mm. So if components are separated by 30 mm or so, there is a good deal of thermal isolation. This is particularly true for components with heat slugs on a multilayer board. So while your Sauna analysis will include traces, pads and vias in key areas, you will probably not exactly duplicate a physical layout. As you gain experience with Sauna, you will quickly learn how to apply a few basic rules to keep the thermal model simple while maintaing good accuracy. When you have interconnected the components, you have a model for a single layer board and the job is complete for those users that work with single layer boards. But, of course, most users have at least 4 copper layers. So you need to create internal layers. As you might guess, Sauna has a command to perform this is a single step. (Note that internal layers can be modeled full plane, or with traces and pads.) Finally, you will create thermal vias in key areas to connect heat slug components with ground and/or power planes. While a board will typically have between hundreds and thousands of small diameter vias, in a Sauna model you simply define a via size and density over a specific area of a laminate layer. This approach provides good accuracy while keeping model size small and calcuation times short. At this point the model is complete. To obtain temperatures, you add float resistors to provide convection and radiation to the room envirnoment. As with heat sinks, you can analyze for natural or forced air cooling. After obtaining temperatures, you can use Sauna to optimize your thermal design. You can easily modify thermal via density, heatsinking pad size, adjust copper weights and shift heat sources. Transient and duty cycle analysis can also be performed. Basic box modeling
Boxes with internal boards, and more
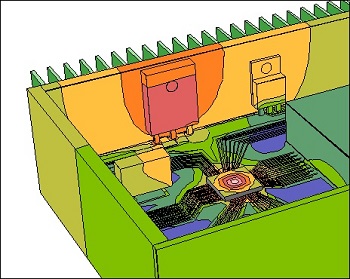
As you know, most electronic products consist of boxes with one or more boards inside. While it is certainly useful to simulate a circuit board or a basic box, the real goal is to have an integrated model which includes both the box and internal boards. Sauna can do this. With some software packages, it is assumed that a box-with-board model is too complicated to include trace-by-trace details on the board. But Sauna has met this challenge. You can also have internal boxes (the "box in box" problem) and you can have the board interact with the walls through brackets, component leads, edge guides and standoffs. And the model can be created in a reasonable time frame (frequently less than one hour) and the calculation completed in a minute or two on a standard Windows computer. To simulate the heat transfer within the box, Sauna has the specialized convection correlations for internal convection (natural or forced). Thermal radiation is particularly important inside boxes. Sauna handles this with integrated gray radiation, including automatic view factor calculation. Once the convection and radiation networks has been defined by the user, Sauna handles all the necessary details of this complex, non-linear calculation. When the temperature calculation is complete, you have many tools to refine and optimize the design. If the model is particularly complex, you can use Sauna's layering system to isolate portions of the model. You can also create separate models for portions of the box, then "append" the model together. Of course, all of the editing tools for heat sinks and board are still at your disposition. In short order, you will have an optimized thermal design. Transient, duty cycle and power shutback
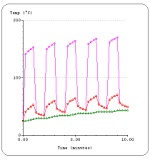
Quick and dirty thermal?As you have seen on this webpage, Sauna can be used to created highly detailed models. But sometimes, all you want is a quick answer. For example, you may be asking: "do I need a fan to dissipate 100 watts in my box?". You may also be wondering: "what happens when a heat sink is turned upside down?" or "what is the end-to-end thermal resistance of a copper trace?". Sauna is an excellent tool for answering these questions. To learn more, see Quick And Dirty Thermal? First class technical supportSauna is moderately priced (from US$ 995.00). Yet we still provide friendly, expert technical assistance. And you can see for yourself, just call (734-761-1956) or email with any question. It's the same team for pre-sale and after-sale support. The next stepThe best way to learn about the Sauna program is to try the free evaluation package. You can request the evaluation package here. If you want additional information on Sauna features, try one of these links:
|
 Array of nodes and thermal resistors
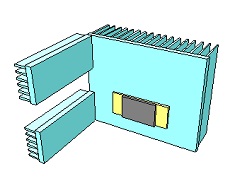 Irregular heat sink with module stackup
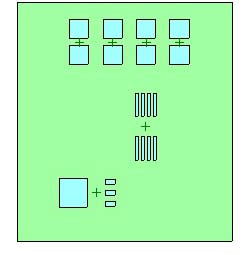 Initial pad layout
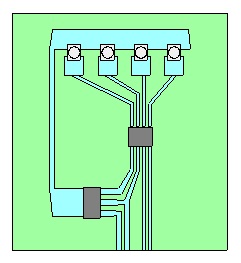 PCB with components and
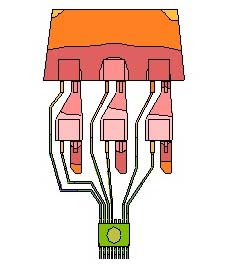 Temperature contours make it easy
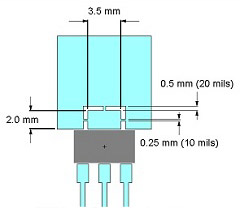 Evaluate thermal relief configurations
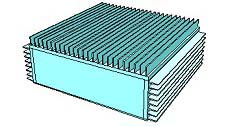 Finned box, easy to model
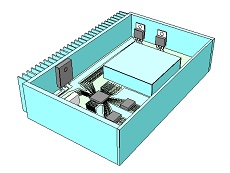 Complex box
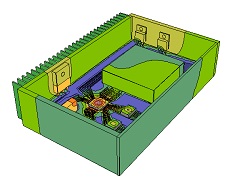 Contours for complex box
